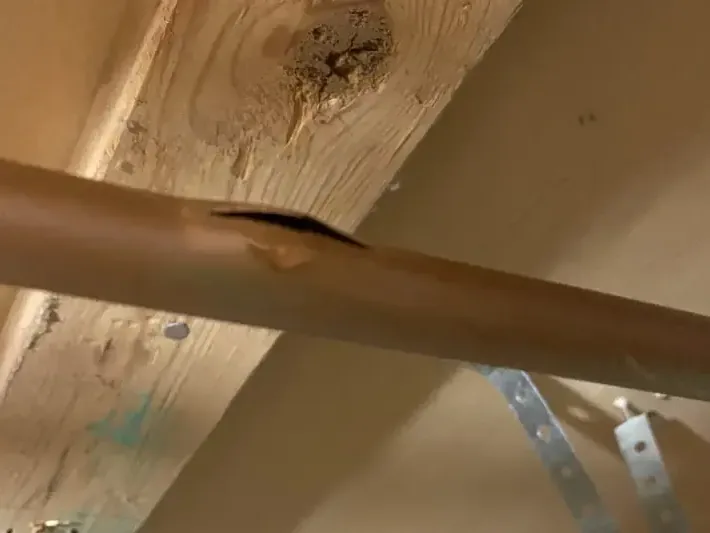
Glen Rock Burst Pipe Water Damage
Pressure can send water well beyond the broken fitting. Glen Rock burst pipe cleanup traces that release through connected spaces after a safe shutoff and a clear plan for repairing the source.
(888) 471-9821Discuss a broken pipe releaseHow burst pipe water damage is handled in Glen Rock
The damaged pipe and the soaked building need separate attention. Cleanup identifies the release path, removes accessible water and evaluates wet finishes before controlled drying addresses retained materials throughout the affected rooms.
First steps for burst pipe water damage
- 1
Use a safe shutoff point
Stopping the supply limits additional release when the valve can be reached without entering hazardous water. A qualified trade should handle an uncertain or unsafe source control situation.
- 2
Leave unstable finishes alone
Saturated ceiling board and insulation can fall. Keeping the space below clear allows assessment before anyone handles belongings or equipment under the affected area.
- 3
Record the water's route
Photographs of the source room and connected surfaces help explain where the release traveled. Include floor edges or lower spaces where staining or dripping appears after the supply stops.
- 4
Arrange access around the break
The plumber needs access to repair the pipe, while cleanup may require a wider opening to reach damp materials. Coordinating those boundaries prevents a repaired source from concealing wet structure.
What does burst pipe water damage cost in Glen Rock, NJ?
Burst pipe water damage cleanup in Glen Rock has planning ranges of $1,200 to $7,500+. Concealed spread and affected levels drive the scope; pipe repair and rebuilding should be identified separately in the estimate.
Localized pipe loss
- Release stays near source
- Accessible surfaces receive extraction
- Small drying area established
Concealed spread
- Water reaches enclosed cavities
- Selective openings expose dampness
- Connected materials need monitoring
Several levels
- Water travels between floors
- Multiple assemblies require assessment
- Broader equipment and documentation
Compare the scope with the water damage cost calculator. The restoration company prices the inspected damage, material access and equipment needs separately from source repairs, replacement finishes and contents work.
The burst pipe water damage process
- 1
Connect the break to the damage pattern
Inspection begins at the release location and follows plausible water paths through the actual building. Stains, drips and moisture readings establish which adjoining surfaces belong in the cleanup scope after the supply has been controlled.
- 2
Extract before opening additional wet areas
Accessible pooled water is removed while fragile or heavily saturated finishes are evaluated. Openings are planned around the damaged assembly so retained materials can be reached without treating every nearby surface as equally affected by the release.
- 3
Dry the structure around the repaired pipe
The pipe repair can stop new water while surrounding wood or insulation remains wet. Equipment addresses those retained materials, and measurements at representative locations help identify pockets that need changed airflow or further access.
- 4
Keep the repair handoff tied to readings
The final record should explain moisture conditions around the break and along the downstream water path. Those observations support closure of the opening and finish restoration once the affected assembly is ready for that separate work.
A split pipe is a small opening with the potential to wet a much larger part of the building. Water can run along a cavity before emerging at a doorway or ceiling joint. Glen Rock cleanup therefore starts with the release path, rather than drawing the work boundary around the broken fitting alone.
Shutoff changes the problem, but leaves the water
Once the supply stops, the remaining damage becomes easier to assess. The source room may contain a visible pool while adjacent finishes show only slight darkening. Checking both conditions helps identify water that has crossed behind trim or collected inside an enclosed floor assembly.
For a home in Ferndale, the layout of the actual rooms determines where those checks belong. The same inspection principle applies around Ackerman Avenue: follow moisture through the actual wall and floor construction to identify which materials remain wet after the source stops.
- Wet ceiling seams below the release
- Floor edges continuing into adjoining closets
- Insulation retaining water beside the repair opening
- Belongings blocking access to affected wall bases
Coordinate source repair with restoration access
The plumber may only need a narrow opening to repair the break. Restoration can require access beyond it when insulation, sheathing or framing remains saturated. Explaining the purpose of each opening helps the owner distinguish source work from the area that needs material drying.
A ceiling below the leak also needs stability assessment before removal work begins. Wet material overhead should not be treated as a convenient drainage point. Restricting the space beneath it protects occupants while qualified personnel decide how to expose and handle the affected assembly.
Track the route back toward a dry building
Doremus Avenue and Rock Road are useful location references when arranging access, but the work plan relies on the house itself. Readings around the source and downstream surfaces establish a moisture map. Dense layers or enclosed corners may need different treatment from open room surfaces.
Equipment settings and placement should respond to those measurements. A wet cavity can lag behind an exposed wall face, so progress in the room air alone is insufficient. The record needs to show how the retained materials changed before anyone closes the repair opening.
- Mark inspected areas beside the source repair
- Measure connected surfaces beyond visible staining
- Explain any additional access before finish removal
- Keep reconstruction separate from initial water control
The repaired fitting is one checkpoint
A useful completion discussion covers both halves of the loss. The source repair addresses the damaged plumbing, while cleanup addresses the water it released. Photographs of openings and material readings help connect those tasks. When the owner can see which surfaces were retained, which were removed and why drying ended, the subsequent finish work has a clearer starting point and fewer hidden assumptions.
Burst pipe water damage coverage
Glen Rock pipe damage assessment includes Ferndale and the Ackerman Avenue area, with room connections and the leak location shaping the work at each affected property.
The same service nearby: burst pipe water damage in Paramus, Fair Lawn, Oradell.
Burst Pipe Water Damage questions
Why is the damaged area larger than the break?
A pressurized release can enter wall cavities or travel along framing before appearing elsewhere. The cleanup boundary follows those wet materials, which may extend into adjoining rooms or a lower space beyond the repaired pipe.
Can a plumber's repair finish the job?
Repairing the pipe stops that source. It does not remove water already in flooring or wall assemblies. A moisture assessment determines what remains affected and whether extraction, opening finishes or controlled drying is still needed.
Should the wet wall be closed immediately?
Closure should wait until retained materials reach suitable moisture conditions and the source repair is complete. Covering wet framing or insulation can hide a continuing problem. Recorded readings help establish a sensible handoff to finish repairs.
What if the leak happened while the house was empty?
Discovery circumstances and the extent of saturation help shape assessment. The team should check connected materials carefully and document water conditions. An unknown duration needs investigation of the damage rather than an assumed drying schedule.
Does the pipe material determine every cleanup decision?
The release location and affected building materials matter more to cleanup than a townwide assumption about pipe type. The plumber evaluates the damaged pipe, while restoration decisions follow water contact, access and remaining material moisture.
Which photographs are useful after shutoff?
Images showing the source opening, each affected room and connected ceiling or floor edges help describe the release. Close views of damaged belongings add detail, provided taking photographs does not require entry into a hazardous area.
Follow the release beyond the fitting
Room by room assessment connects the repaired source with extraction, cavity access and remaining drying needs.