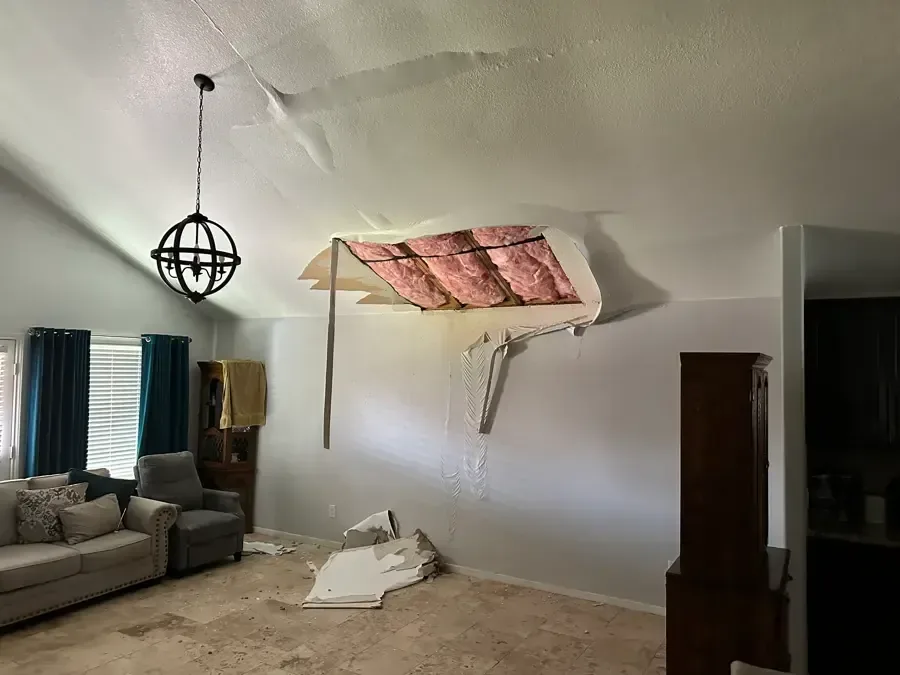
Ceiling Leak Water Damage in Maywood
A spreading ceiling stain may sit below water held in insulation or framing. Keep the space beneath a sagging section clear while the source and stability of the overhead assembly are assessed.
(888) 471-9821Assess this ceiling changeHow ceiling leak water damage is handled in Maywood
Ceiling leak cleanup begins with safe room access and an inspection above the damaged finish. The work connects visible stains with retained moisture, removes unstable layers and establishes drying access where construction conceals the water.
First steps for ceiling leak water damage
- 1
Leave the sagging area empty
Move people away from overhead bulges and falling debris. Avoid climbing beneath the damage or probing the surface, and describe any visible movement before an inspection is arranged.
- 2
Keep wet fixtures untouched
Do not operate a light or switch associated with a wet ceiling. Electrical assessment belongs with the appropriate professional, especially when water has traveled through a fixture opening.
- 3
Explain what sits overhead
Identify whether an upper bathroom, utility area or roof space lies above the mark. Include recent plumbing use or rainfall observations to help connect the visible damage with its source.
- 4
Preserve a safe visual record
Take photographs from a doorway and note changes in stain size or dripping. Keep source repair information with those images so cleanup and finish decisions follow the same history.
What does ceiling leak water damage cost in Maywood, NJ?
Maywood ceiling leak cleanup can range from $900 to $5,500+ for planning. The affected cavity, unstable material and insulation access drive the restoration scope; source repair and new decorative finishes may require separate estimates.
Small stable section
- Limited damp surface area
- Accessible moisture inspection
- Focused cavity drying needs
Open wet cavity
- Controlled ceiling material removal
- Wet insulation handling
- Exposed framing moisture checks
Broad overhead loss
- Several connected ceiling areas
- Additional damaged wall edges
- More extensive drying access
Compare the scope with the water damage cost calculator. The restoration company prices the inspected damage, material access and equipment needs separately from source repairs, replacement finishes and contents work.
The ceiling leak water damage process
- 1
Assess the overhead work area first
The initial inspection considers sagging, fixtures and access before measuring the wet finish. It identifies where people and belongings must remain clear and which conditions need source repair or electrical attention before further work.
- 2
Connect the stain with concealed moisture
Inspection moves above the surface where safe access allows, checking framing, insulation and adjacent walls. The findings define the affected cavity and explain any opening needed to reach material that cannot be evaluated through the finish.
- 3
Remove unstable layers and establish drying
Damaged finishes are handled in a controlled work area, with retained materials exposed as needed. The drying arrangement directs airflow toward the wet assembly while protecting the room below from debris and unnecessary disturbance.
- 4
Document readiness for ceiling reconstruction
Moisture checks return to the affected cavity and surrounding surfaces. Once retained materials meet the drying objective, the record identifies what was removed and which source or finish repairs remain before the ceiling can be restored.
A ceiling can hold a surprising amount of water before its surface gives way. Bowing, soft seams and dripping around a fixture change the room’s safety. Keep people out from underneath and arrange assessment from a dry access point rather than pressing, puncturing or standing on furniture to inspect the damaged area.
Start above the visible mark
The stain location is an inspection clue. Water may travel along a joist, pipe or ceiling surface before it becomes visible. The source could be plumbing, an appliance or roof entry, so the assessment should compare the rooms and assemblies above the mark before selecting a repair trade.
Memorial Park sits across from Memorial School on Grant Avenue. For a property in that part of the borough, describe the affected room and upper floor access when arranging cleanup. The most useful directions within the building lead to the space above the leak as well as the stain below.
- Restrict access beneath bulges or separating ceiling seams.
- Keep switches and wet light fittings untouched.
- Photograph the stain from outside the damaged zone.
- Report recent plumbing use or rain around discovery.
Expose only what the condition requires
Unstable wallboard may need controlled removal before anyone can work safely beneath it. Wet insulation can conceal the upper side of the finish and restrict airflow. The removal decision should explain the material condition, contamination and access needs rather than simply following the outline of the visible stain.
A small brown ring and a broadly softened ceiling represent different repair problems. Even with a narrow surface mark, the inspection may find a larger wet cavity. Record the concealed condition as it becomes accessible, especially when water has reached an adjacent partition or an electrical fixture.
Dry the cavity before restoring the appearance
Equipment needs access to the materials that retained water. Depending on the construction, airflow may require an opened section or a targeted drying arrangement. Repeat readings at the affected framing and surrounding surfaces help determine whether the cavity responds or whether trapped insulation continues to obstruct drying.
The final finish work should follow source correction and material checks. Painting too early can hide a recurring stain and make later inspection harder. Photographs of the opened assembly, removal decisions and final drying conditions provide a useful handoff to the contractor replacing the ceiling surface.
Do not use a bucket as the whole response
Catching a drip can protect a reachable floor. Ceiling stability needs a separate assessment before anyone works beneath the damaged area. Avoid placing or emptying a container beneath a bulging section. Report any new cracking, falling debris or change in the drip location. The cleanup plan needs to address both the overhead hazard and the moisture path, including lower finishes that received water after it passed through the ceiling.
Ceiling leak water damage coverage
Ceiling damage assessment is available for Maywood properties with overhead stains, active dripping or sagging finishes, including checks of connected rooms above and below the affected area.
The same service nearby: ceiling leak water damage in Paramus, River Edge, Fair Lawn.
Ceiling Leak Water Damage questions
Is a bulging ceiling safe to puncture?
A bulge can release water and unstable material unexpectedly. Keep clear and let an appropriate professional assess the overhead condition. Puncturing from below places the person directly beneath the section most likely to fall or discharge trapped water.
Can the leak originate away from the stain?
Yes. Water can follow framing or other surfaces before finding an opening in the finish. The investigation checks the space above and nearby connections, rather than assuming the source sits directly over the center of the visible mark.
Does wet insulation always stay in place for drying?
Its condition, contamination and access determine the decision. Insulation that blocks cavity drying or has lost its useful shape may require removal. The scope should explain how retained framing will be reached and checked after that decision.
Should paint wait after the dripping stops?
Yes. The source and material moisture need assessment before cosmetic work. A ceiling may stop dripping while its backing or insulation remains wet. Painting belongs after the assembly is stable and sufficiently dry for the planned finish repair.
What happens to the floor below the leak?
It needs its own inspection if water reached it. Carpet, wood and furniture beneath the ceiling may retain moisture even after overhead work begins. Include those surfaces in the damage record so the lower part of the loss is addressed.
Can only the damaged ceiling section be replaced?
A limited repair may be possible when the remaining assembly is sound and dry. The actual boundary depends on material condition, access and finish requirements. Inspection and drying findings should inform that boundary before reconstruction is scheduled.
Address the wet cavity before repainting
Source correction and drying checks establish the next repair step for damaged ceiling materials.