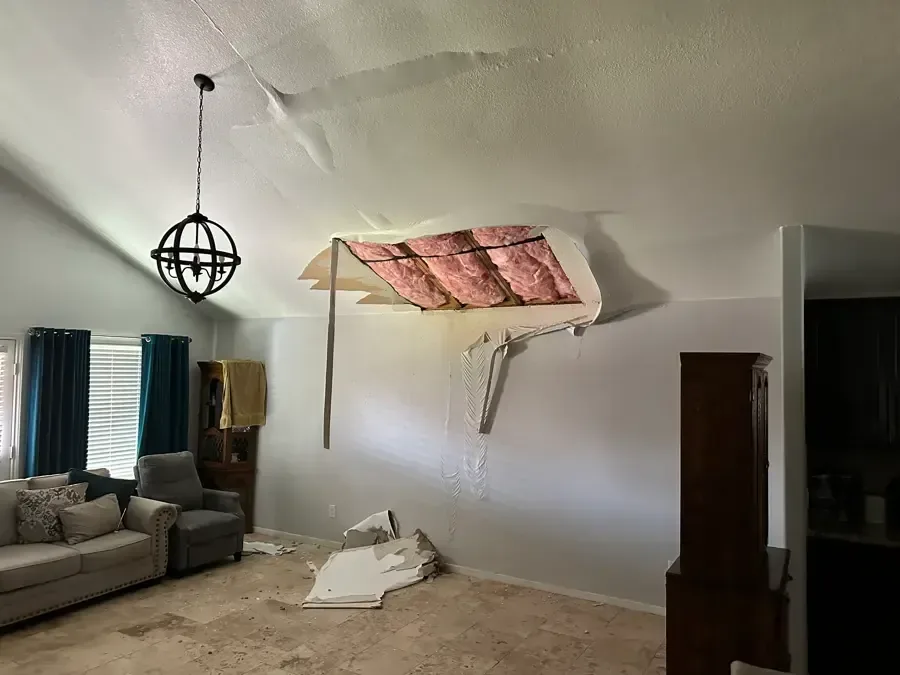
Ceiling Leak Cleanup in River Edge
A ceiling stain is the visible end of a water path. River Edge ceiling cleanup starts with overhead safety, then follows the moisture into the space above the damaged finish.
(888) 471-9821Describe the ceiling conditionHow ceiling leak water damage is handled in River Edge
Ceiling leak restoration joins source tracing with careful treatment of wet overhead materials. The scope can include extraction, damaged finish removal, insulation assessment and drying of framing that remains above the room.
First steps for ceiling leak water damage
- 1
Clear the overhead hazard area
Keep people away from a sagging or shedding ceiling. Do not stand underneath to collect water, move furniture or press the damaged finish while its stability remains uncertain.
- 2
Avoid wet electrical fixtures
Leave damp lights, switches and nearby equipment untouched. Describe their location when arranging an assessment so the access plan can account for electrical concerns before ceiling work begins.
- 3
Observe the timing safely
Note whether the stain changes during rainfall or household water use. Useful observations can be made from a safe position without turning fixtures on to reproduce the leak.
- 4
Preserve the initial room condition
Photograph the ceiling and any wet surfaces below before cleanup changes them. Mention the room above and whether a plumber or roofer has already addressed the suspected source.
What does ceiling leak water damage cost in River Edge, NJ?
Ceiling leak cleanup in River Edge commonly uses planning ranges of $900 to $1,900 for a small stable section, $1,900 to $3,600 for an open wet cavity, and $3,600 to $5,500+ for broad overhead loss.
Small stable section
- Limited ceiling damage
- Accessible moisture checks
- Focused drying setup
Open wet cavity
- Damaged layer removal
- Exposed framing assessment
- Cavity moisture monitoring
Broad overhead loss
- Wider safety controls
- Extensive material handling
- Connected room treatment
Compare the scope with the water damage cost calculator. The restoration company prices the inspected damage, material access and equipment needs separately from source repairs, replacement finishes and contents work.
The ceiling leak water damage process
- 1
Assess stability and source clues
The ceiling condition and nearby electrical components shape safe access. Observations above and below the stain narrow the source investigation and define the first inspection area, including places where water traveled before reaching the visible drip.
- 2
Expose damaged layers under controlled conditions
When removal is necessary, the opening addresses unstable finish and wet materials that obstruct drying. The work boundary should protect the room below while allowing the cavity to be inspected for moisture extending beyond the visible mark.
- 3
Dry retained overhead materials
Equipment is arranged to reach the exposed or accessible assembly, with moisture removal supporting evaporation from framing. Repeat readings check progress and highlight pockets where insulation, limited access or continued entry may be slowing the drying response.
- 4
Record readiness for ceiling reconstruction
The final condition record identifies retained framing, removed layers and remaining repair needs. Closing the ceiling follows the drying assessment and source correction, with cosmetic finishing treated as the later step that restores the room's appearance.
A dark ring, a bulge and a steady drip can indicate very different ceiling conditions. The first assessment in a River Edge room considers stability and electrical exposure before anyone works below the damage. Once safe access is established, the investigation follows water above the finish to locate the active source and concealed wet materials.
Start with what the ceiling is doing
Softening, separation at seams or visible sagging can change how the room is used. Furniture should not be moved beneath unstable material merely to clear space. A controlled opening, when needed, must account for retained water, loose finish and wet insulation that could fall into the room.
In Cherry Hill, an upstairs plumbing release may appear as a downstairs ceiling mark. Another property may have rain entering above the ceiling cavity. The source determines the repair coordination, while the inspection establishes how far water traveled before it emerged through the painted surface.
- Restrict the area beneath bulging or loose material.
- Describe nearby lights or other electrical fixtures.
- Note whether dripping changes with rain or water use.
- Keep photographs of the first visible ceiling changes.
Trace wet layers beyond the stain boundary
Paint can display a small mark while insulation holds water over a broader area. Framing can also direct flow sideways, so the source may sit away from the drip. The inspection should compare the visible stain with readings and accessible conditions inside the cavity.
For a home in North Hackensack, access might come from the room above or require selective ceiling removal. The choice should follow the assembly and hazard assessment. Opening enough to reach damaged layers helps the retained materials dry without treating the entire ceiling as automatically unsalvageable.
Separate drying from cosmetic ceiling repair
A coat of paint can conceal discoloration while moisture remains overhead. Drying needs to reach the framing and other retained layers before the opening is closed. Progress records help explain whether the cavity is improving and whether wet insulation or restricted airflow is delaying that change.
Near Roosevelt School, as elsewhere in the borough, the scope should describe the actual room and affected assembly. Ceiling replacement, painting and source repair are distinct tasks. If water has also reached lower surfaces, floor water removal may be part of the same cleanup sequence.
Keep the source behavior in the assessment notes
A drip that appears during fixture use suggests a different investigation from one noticed during rain. Describe the timing without deliberately recreating a leak. Photographs and a simple sequence of observations help connect the ceiling damage to the work above it, while a stability assessment determines how the space below can be approached safely.
Ceiling leak water damage coverage
Ceiling assessments serve Cherry Hill, North Hackensack and properties near Roosevelt School, with entry planning based on the affected room and safe overhead access.
The same service nearby: ceiling leak water damage in Paramus, Oradell, Maywood.
Ceiling Leak Water Damage questions
Can a small stain hide a larger wet area?
Yes. Water can spread through insulation or along framing before appearing on the painted face. The stain is a useful starting point, while cavity inspection and moisture readings help establish the wider affected assembly.
Is it safe to sleep beneath a dripping ceiling?
Room use depends on ceiling stability, electrical exposure and the source. Keep clear of sagging or loose material and arrange assessment. A container beneath the drip does not address the condition of the overhead layers.
Should the ceiling be painted after it stops dripping?
Painting should wait until the source is controlled and the wet assembly has been assessed and dried. A drip can stop while insulation and framing retain moisture, so disappearance of the visible leak is insufficient.
Will every ceiling leak need an opening?
The need depends on stability, material damage and drying access. An accessible cavity may allow inspection from above, while wet or damaged layers may require removal below. The proposed opening should serve a clear assessment or drying purpose.
Can the source be in another room?
Water can travel along structural members and emerge away from its origin. Plumbing above an adjoining space or a roof entry farther away may require investigation. The assessment follows the actual moisture path through accessible materials.
What belongs in the repair handoff?
The record should identify source correction, removed finishes, retained materials and closing moisture conditions. It should also describe remaining ceiling and paint work so the next stage can proceed without concealing an unresolved wet cavity.
Address the wet space above the finish
A controlled inspection connects ceiling safety with source tracing, material access and a documented path toward repair.