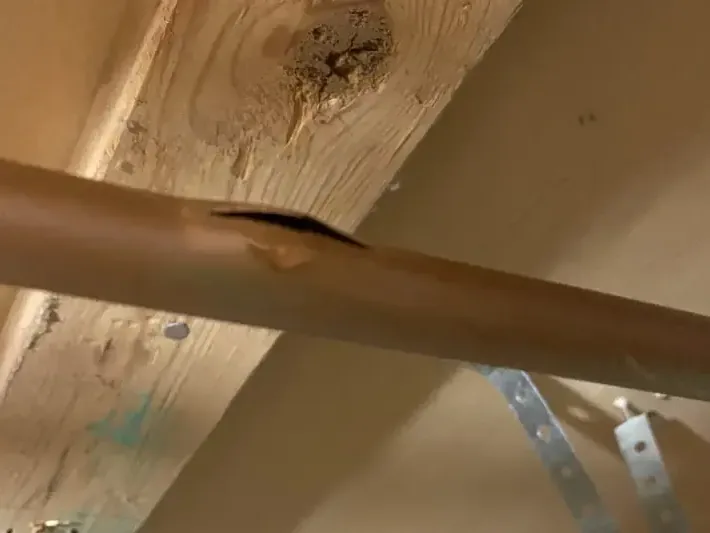
Burst Pipe Cleanup in River Edge
A pipe break can send water behind finishes before a shutoff is reached. River Edge burst pipe cleanup traces that spread from the damaged plumbing to the materials needing extraction and drying.
(888) 471-9821Explain the broken pipe damageHow burst pipe water damage is handled in River Edge
Burst pipe restoration addresses water already released into the building. Plumbing repair stops the source, while extraction, selective opening and monitored drying deal with wet assemblies that remain after the pipe is repaired.
First steps for burst pipe water damage
- 1
Find a dry shutoff route
Stop the household supply only if the control is reachable safely. Do not cross pooled water or reach past wet electrical components while trying to limit the release.
- 2
Keep clear below wet ceilings
A burst above a finished room can load the ceiling with water. Restrict the space beneath sagging material and leave opening or draining to an assessed work plan.
- 3
Note rooms along the path
Record visible changes around the pipe and in adjoining or lower rooms. Water can move through small openings, so mention stains beyond the area with the largest puddle.
- 4
Separate source and cleanup tasks
Explain whether a plumber has stopped or repaired the break. The restoration scope can then address the remaining water without confusing pipe repair with the drying of affected materials.
What does burst pipe water damage cost in River Edge, NJ?
Burst pipe damage in River Edge carries planning ranges of $1,200 to $2,800 for a localized loss, $2,800 to $5,200 for concealed spread, and $5,200 to $7,500+ when several levels are affected.
Localized pipe loss
- Contained supply release
- Reachable affected surfaces
- Limited cavity opening
Concealed spread
- Wet internal layers
- Selective assembly access
- Expanded drying measurements
Several levels
- Connected vertical damage
- Broader material handling
- Multiple equipment zones
Compare the scope with the water damage cost calculator. The restoration company prices the inspected damage, material access and equipment needs separately from source repairs, replacement finishes and contents work.
The burst pipe water damage process
- 1
Map the release from its origin
The inspection starts around the failed pipe and follows moisture into connected finishes. The resulting map includes adjoining rooms and lower surfaces when readings or visible changes indicate water traveled beyond the initial discovery area.
- 2
Remove collected water and damaged layers
Accessible water is extracted before materials are evaluated for retention. Openings focus on damaged finishes and trapped moisture, while removed items are documented so later repairs can be described accurately and priced separately.
- 3
Treat cavities as part of drying
Air movement and moisture removal are arranged around the assemblies left in place. Concealed pockets receive targeted attention, and readings are compared over time to check that the selected access is producing useful drying progress.
- 4
Confirm the structure can move toward repair
Closing measurements and condition notes identify the drying endpoint. The handoff should state which areas were opened, which materials remain and what finish work is needed after the corrected plumbing and dried building are ready.
A sudden release can fill a cavity long before water reaches a visible doorway. Burst pipe cleanup in River Edge follows the route through that cavity rather than stopping at the largest puddle. The pipe itself needs repair, and the surrounding structure needs a separate decision about water removal, material access and drying.
Separate the broken pipe from the wet building
May 27, 2013: A water-main break at Kinderkamack Road and Main Street caused street flooding. A household supply failure calls for work at the building's own plumbing and affected rooms. The assessment records the present source, shutoff condition and where released water traveled indoors.
At a property in Cherry Hill, water escaping behind a wall may collect under flooring or emerge through the ceiling below. Checking the room beneath the pipe can be as important as inspecting the room where the leak was discovered. Gravity and openings shape the route.
- Locate the damaged supply section with plumbing support.
- Inspect the cavity immediately around the release.
- Trace wet thresholds and lower-level ceiling changes.
- Mark affected material edges before removal begins.
Make openings serve a clear purpose
A wet wall does not automatically need complete demolition. Access should expose damaged or moisture-holding layers that cannot be cleaned or dried effectively in place. Soft wallboard, saturated insulation and swollen trim require individual decisions based on condition and the actual water exposure.
Unnecessary opening can increase repair work, while too little access can leave moisture trapped. The proposed removal boundary should explain what it exposes and how the retained structure will be monitored. Photographs before and after opening help connect the original damage with the resulting repair scope.
Dry the route, including the quiet corners
The obvious room may dry faster than a narrow cavity or a layered floor. Equipment placement needs to account for those slower assemblies. Repeated readings show whether moisture is declining and help identify an ongoing leak, blocked airflow or an overlooked wet layer when progress stalls.
Furniture, built-in storage and closed doors can hide the farthest edge of a release. Those boundaries deserve inspection before the drying area is reduced. Where pooled water remains, extraction creates a clearer starting point for the material drying work that follows.
Keep the discovery sequence with the damage record
A short account of the first sound, stain or puddle can help locate the spread. Include when the supply was stopped and which room changed next. Preserve plumbing repair information alongside cleanup photographs so the source correction and the building restoration remain clear parts of the same incident.
Burst pipe water damage coverage
Homes around Kinderkamack Road, Main Street and Cherry Hill can describe the affected level, shutoff status and access to the damaged pipe when arranging cleanup.
The same service nearby: burst pipe water damage in Paramus, Oradell, Maywood.
Burst Pipe Water Damage questions
Does a repaired pipe mean cleanup is finished?
No. Repair stops the release, but wall cavities, floor layers and insulation can remain wet. The cleanup scope should address those materials independently and document their condition before finishes are put back over the affected assembly.
Can water move into a room without a puddle?
Yes. Moisture can travel behind trim or through floor joints without collecting visibly on the surface. Comparison readings in adjoining rooms help establish whether the apparent boundary matches the actual extent of wet building materials.
Should a ceiling be punctured to drain it?
A sagging ceiling can release water and material unexpectedly. Keep the area below clear and arrange a stability assessment. Controlled opening belongs within a work plan that addresses the overhead hazard and protects the surrounding space.
Can saturated insulation stay in the wall?
That depends on its type, condition, exposure and ability to dry. Wet insulation may obstruct cavity drying or lose its useful form. The removal decision should be explained alongside the proposed treatment of adjacent framing and finishes.
Are plumbing and finish repairs part of the estimate?
The written scope should identify included work clearly. Pipe repair, drying and rebuilding are different tasks, even when they relate to the same release. Separate descriptions help clarify responsibility and prevent assumptions about what follows extraction.
What should be kept for a claim?
Keep discovery photographs, source repair details, the cleanup estimate and drying records. A brief timeline of visible changes is useful too. Policy terms determine coverage; the work record should describe the actual damage and the actions performed.
Bring the wet assembly into view
A focused assessment identifies affected layers and gives the drying plan a clear boundary before finish repairs begin.